Overview
Imagine we’re building a backend payment system that is made up of three services:
- Product Service – manages products and inventory
- Order Service – creates and tracks orders
- Payment Service – handles payments
In an era defined by rapid development and massive deployments, the pressure for high availability is relentless. Without the right tools, "daily developer life" quickly spirals into a cycle of maintenance nightmares, broken syncs, and missed deadlines.
To stay competitive in 2026, we need more than just code - we need isolation, portability, and infinite scalability. This is where the power of a Kubernetes orchestrator paired with Docker becomes non-negotiable. By containerising our environment, we transform chaotic deployments into a streamlined, predictable engine.
In this guide, we will build a backend payment system made up of three Node.js + TypeScript microservices - Product, Order, and Payment - containerise each with Docker, and orchestrate them with Kubernetes.
At first, managing a few microservices feels simple: you run each service locally and connect them together. But as you add more services, the setup quickly becomes messy. Every new service adds more configuration, more processes to manage, and more opportunities for failures before development even begins.
Docker solves this by packaging each service with everything it needs to run into containers. This ensures consistent behavior across environments, making it ideal for running a single microservice in an isolated space. However, once your app grows into multiple services, Docker alone does not provide production-grade orchestration.
However, once your app grows into multiple services, Docker alone doesn’t provide production-grade orchestration.
That’s where Kubernetes comes in. It provides the orchestration layer that keeps containers running reliably at scale, offering:
In short, it enables you to operate multi-service applications with minimal manual intervention.
Now that we’ve got that out of the way, let’s get started!
In the root directory of each service, create two files:
The Dockerfile contains instructions that Docker uses to automatically build a Docker image. The .dockerignore file excludes files from the Docker build context.
Dockerfile example:
1FROM node:<version>-alpine23WORKDIR /app45COPY package*.json ./6RUN npm install78COPY ./ ./910CMD ["npm", "start"]Replace <version> with your actual Node.js version (e.g., 20).
.dockerignore example:
1node_modulesFor simplicity, we will just exclude node_modules. (*We already have npm install command in our Docker file, so we do not need to copy the local dependency. We can install them.
Once the Dockerfile is ready, the next step is to build the Docker image and push it to Docker Hub, so Kubernetes can pull and deploy it. (We can do without publishing the Docker image, but in the sake of simplicity lets keep that way.)
Make sure you know your Docker username before proceeding.
We build an image of our service using:
1docker build -t <username>/<service>-srv:latest .<username> – Your Docker Hub username
<service> – Your service name
After the image is successfully built, push it to Docker Hub using:
1docker push <username>/<service>-srv:latestAfter completing these steps:
Now that the Docker images are built and pushed to Docker Hub, the next step is to create Kubernetes YAML files that define and manage the microservice deployments.
Create an infra/k8s folder inside the project root to store all Kubernetes configuration files. Your project structure should look something like this:
1microservice-app/2├── product/3│ ├── index.js4│ ├── package.json5│ ├── Dockerfile6│ └── ...7├── order/8│ ├── index.js9│ ├── package.json10│ ├── Dockerfile11│ └── ...12├── payment/13│ ├── index.js14│ ├── package.json15│ ├── Dockerfile16│ └── ...17└── infra/18 └── k8s/ # Your Kubernetes YAMLs go here19 ├── product-deployment.yamlproduct-deployment.yaml example:
1apiVersion: apps/v12kind: Deployment3metadata:4 name: product5spec:6 replicas: 17 selector:8 matchLabels:9 app: product10 template:11 metadata:12 labels:13 app: product14 spec:15 containers:16 - name: product17 image: <username>/product-srv:latest18 ports:19 - containerPort: <port>20---21apiVersion: v122kind: Service23metadata:24 name: product-srv25spec:26 selector:27 app: product28 ports:29 - port: <port>30 targetPort: <port><username> – Your Docker Hub username
<port> – Your service port
Kubernetes configuration file is now complete, and we can deploy it with the command:
1kubectl apply -f deployment-product.yamlNote that we should repeat steps 2 and 3 to for Order and Payment services as well.
Now let’s verify that everything we created is running correctly.
Get all created pods
1kubectl get podsexample output:
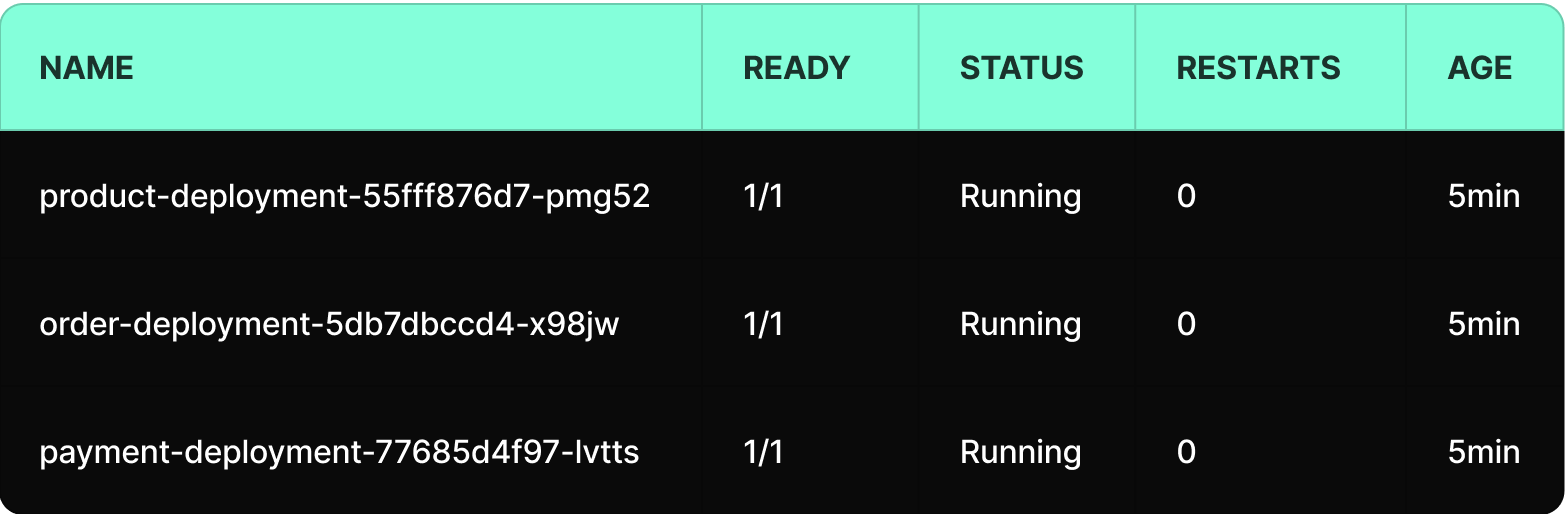
If the name contains the name of your YAML file, you’re good to go.
The name is in the format: [pod-name] = [deployment-name]-[replicaset-hash]-[pod-id], which is meaningful for the Kubernetes engine.
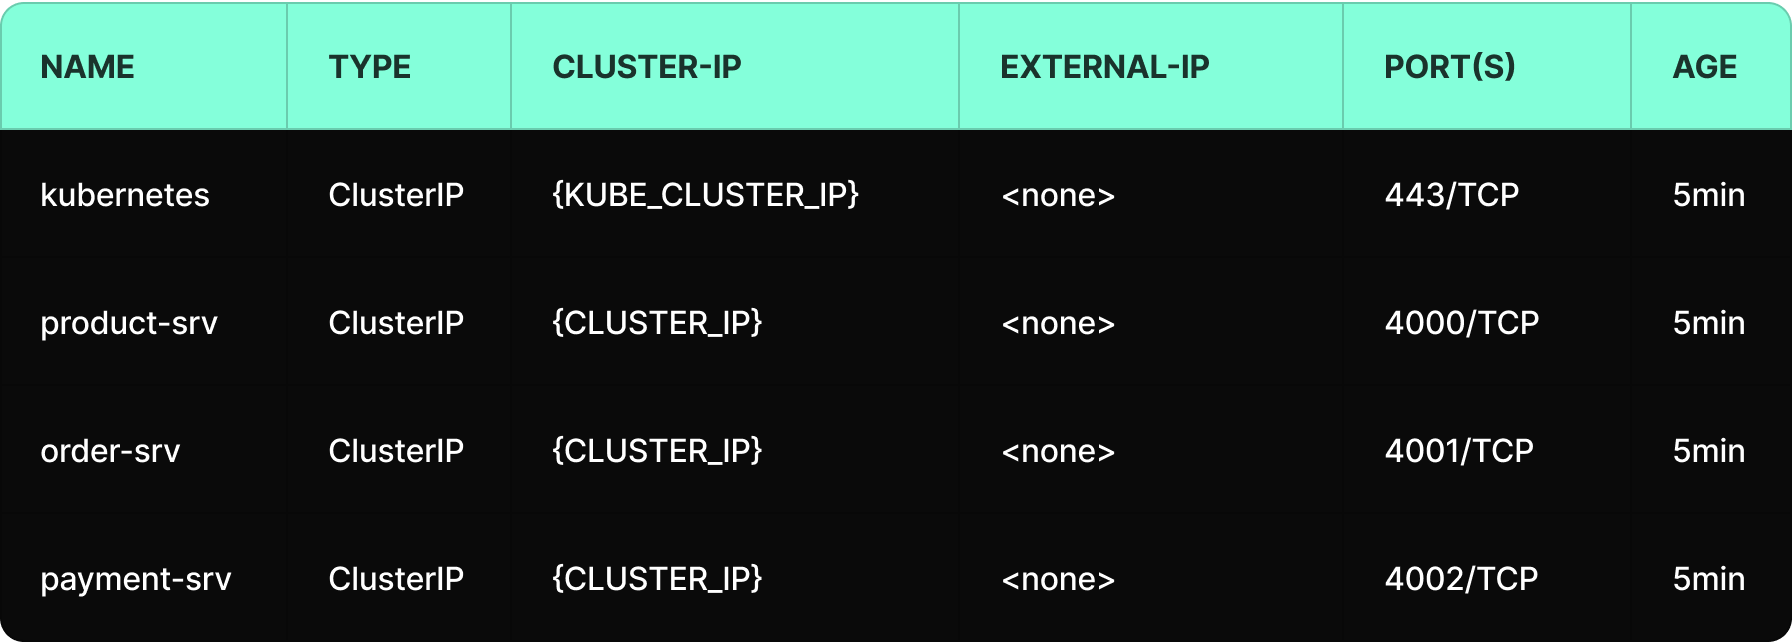
Get all created services
1kubectl get servicesExample output:
Get all created deployments
1kubectl get deploymentsExample output:
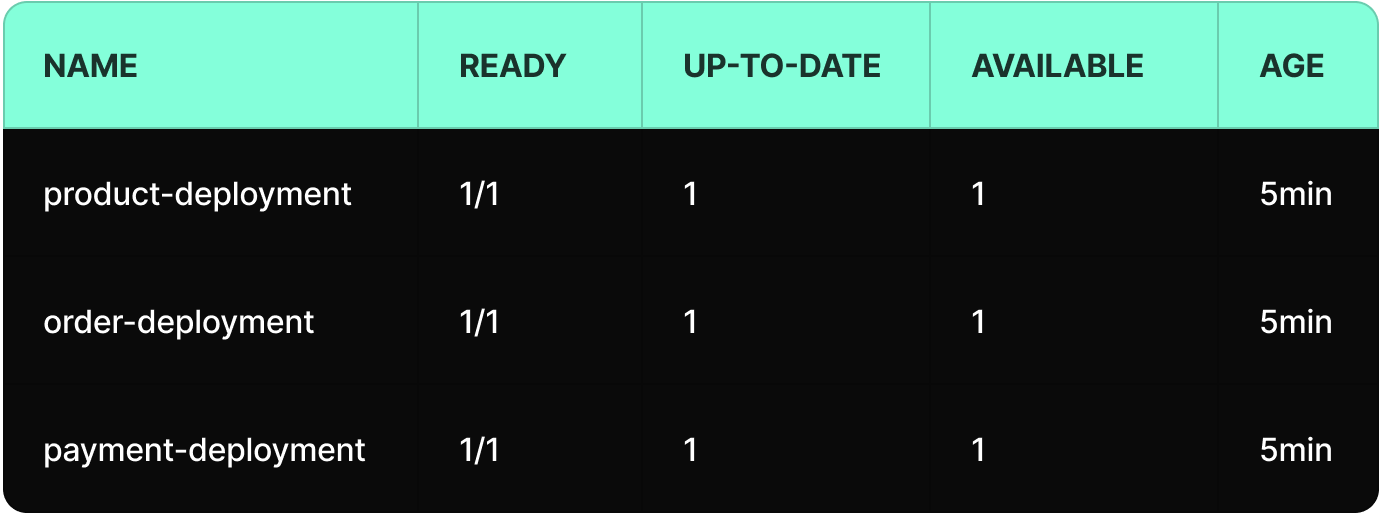
Congratulations, your deployments are now up and running! 🎉
To deploy or update a service, use:
1kubectl apply -f deployment-product.yamlYou can also apply everything in the /k8s folder:
1kubectl apply -f k8s/To deploy or update a service, use:
1kubectl apply -f deployment-product.yamlTo view real-time logs
1kubectl logs -f <pod-name>Reminder, we can get the pod name from the command:
1kubectl get podsDeleting the deployment also deleted all managed pods by that deployment.
1kubectl delete -f deployment-product.yamlOr delete everything in the k8s/ folder:
1kubectl delete -f k8s/Over the course of this guide, we took the concept from theory to practice. We built and containerised services using Docker, deployed them into a Kubernetes cluster, validated deployments, monitored runtime status, and used logs for troubleshooting.
What can you imagine more? 😊
That’s it! You have successfully deployed your services to Kubernetes and learned the essential workflows to keep them running smoothly. With these tools, deployments are no longer a struggle; they are a controlled, predictable process, and must have thing in 2026.
Deployment chaos is no longer the default, and what once felt fragile and unpredictable is now resilient by design.
By containerising our services and handing orchestration to Kubernetes, we’ve moved from reactive firefighting to controlled execution. This is how modern backend systems are engineered, and it’s only the beginning. Now that your foundation is solid, the real optimization begins, and scalability is just a word.